In case you are having issues accessing some web sites or apps, one method to clear up it’s by flushing the DNS cache in your pc. The way you do this depends upon the gadget you’re utilizing as a result of it can fluctuate from Home windows to Mac and from Chrome OS to Linux. On this article, we’ll present you methods to flush DNS cache in Home windows 11. We can even let you know all about DNS cache and the way flushing it may possibly assist repair random connectivity points.
Flush DNS Cache in Home windows 11 (2021)
In case you are experiencing connectivity points even after deleting the non permanent information and clearing the app cache in your Home windows 11 pc, the underlying downside may be with the way in which the community is configured. To appropriate it, you’ll must flush the DNS resolver settings in your pc. Greatest observe dictates that you just additionally restart your modem and router to filter all cached DNS settings. With that mentioned, let’s get began:
Be aware: This tutorial focuses on flushing DNS cache in Home windows 11. For different platforms, try methods to flush DNS cache in Android and clear DNS cache on macOS gadgets.
What’s DNS Cache and Why Ought to You Care?
DNS cache is a file that features the hostnames and IP addresses of the web sites you could have visited in your pc. Because the identify suggests, it caches the webpage, which ends up in the location loading quicker the subsequent time you open it. The caches are situated within the consumer pc, in addition to within the servers of the ISP (Web Service Supplier).
Whereas most methods linked to the web routinely replace the cache and hostname, issues come up when the IP deal with of a webpage modifications earlier than the replace. That’s when you may have connectivity points, with the web page failing to load in your browser. Flushing the DNS cache removes all of the saved (cached) info, which forces the pc to retrieve related new knowledge somewhat than serving up previous and out of date knowledge.
Steps to Flush DNS Cache in Home windows 11
Be aware: This information solely offers with clearing your DNS cache. To alter your DNS service supplier, try our detailed tutorials on methods to change DNS settings on Home windows.
Technique 1: Utilizing Command Immediate
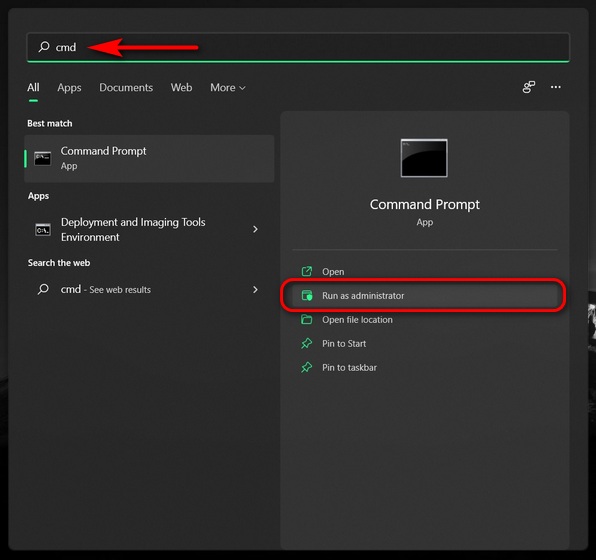
- First, open a Command Immediate window in Admin mode. To do this, seek for “cmd” (with out quotes) within the Home windows search bar and choose Run as Administrator.
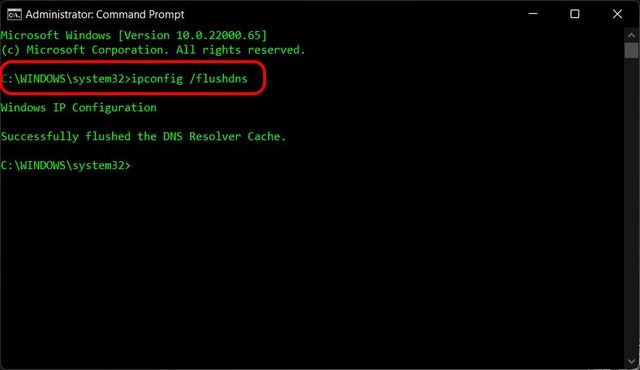
- Now, copy + paste the next command:
ipconfig /flushdnsand press Enter to flush the DNS cache in your Home windows 11 pc. You’re going to get a message saying the operation is profitable.
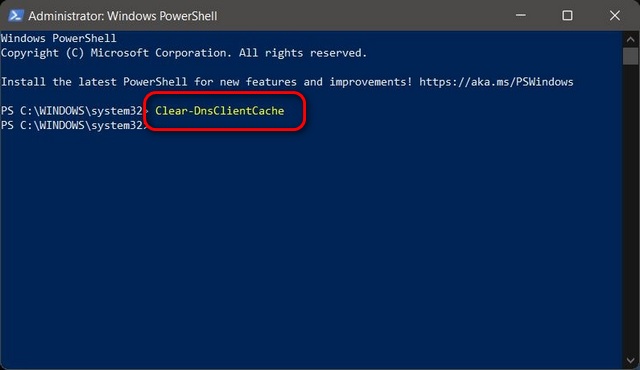
Technique 2: Utilizing Home windows PowerShell
One other method to flush the DNS cache on Home windows 11 PCs is by utilizing PowerShell. Right here’s the way you do this:
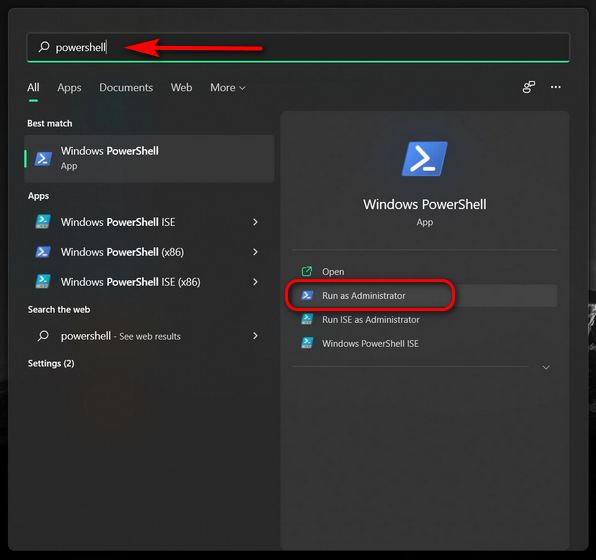
- Open Home windows PowerShell in Admin mode in your Home windows PC. To do this, seek for “powershell” within the Home windows search bar and click on Run as administrator.
- Within the PowerShell window, copy + paste the next command and press Enter:
Clear-DnsClientCache. It will clear the DNS cache of your Home windows 11 pc immediately.
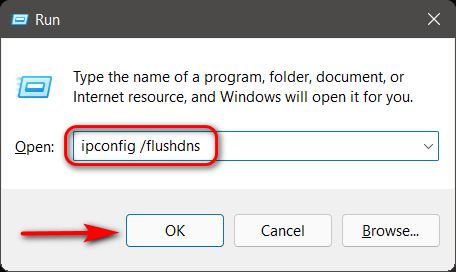
Technique 3: Utilizing a Run Command
You may as well clear the DNS cache straight from the Run dialog field with out opening both the Command Immediate or PowerShell. That is in all probability the simplest method to clear DNS cache on Home windows pc, and right here’s the way it works:
- Open the Run field by utilizing the Home windows 11 keyboard shortcut Home windows key + R. Now, kind the next command:
ipconfig /flushdnsand hit Enter. It will flush the DNS cache in your Home windows 11 pc.
Technique 4: Utilizing a Batch File
Lastly, for those who would somewhat automate the method of flushing the DNS cache in your Home windows PC, you may create and use a batch file for the aim. So, obtain this batch file and run it to clear the DNS cache in Home windows 11.
A batch file, in case you’re unaware, features a set of instructions and you’ll simply run the file at scheduled intervals or on-demand to execute these instructions. To know extra, try our detailed article on batch information and methods to use them to automate duties on Home windows.
Clear DNS Cache in Chrome
Some Home windows apps, together with Google Chrome, have DNS caches of their very own. It’s separate from the DNS cache saved by your working system. In these instances, you’ll have to clear the DNS Cache of those purposes as nicely. For Google Chrome, that is the way you do it:
- First, open Google Chrome in your pc. Now copy + paste the next URL within the browser’s deal with bar:
chrome://net-internals/#dnsand hit Enter. It can load the DNS tab of Chrome’s “internet internals” web page. Right here, click on on the “Clear host cache” button to clear up Chrome’s DNS resolver cache.
![]()
Flush DNS Cache to Clear up Connectivity Points in Home windows 11
Flushing DNS cache could sound like a ton of tech jargon, nevertheless it’s a simple endeavor, as you now know. There are a number of methods to flush the DNS cache in Home windows 11 PCs, together with utilizing the Command Immediate, the PowerShell, and the Run command. So go forward, flush the cached DNS knowledge in your Home windows 11 pc to repair any underlying connectivity points and enhance your privateness. When you do this, try a few of our different DNS-related articles, together with the finest DNS servers you should use and the distinction between VPN and DNS.


